Tips and Hints - complete listing
Checklists, hints and tips about the things we often take for granted
VGA Cables are still the most used cable for projectors in education despite digital HDMI technology becoming more popular
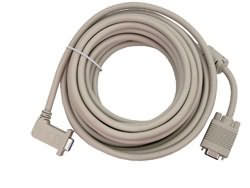 VGA Cables for installation, have different requirements to the trailing cables and cords used for direct connection or to a wall plate, as they are used where the position of the projector is fixed. A table top projector may be connected to different computers and at different distances from the screen each time it is used. Consequently whether a fixed installation needs DDC ie extra wires in the VGA cable to automatically adjust the picture qualities is debatable (DDC is not really needed for fixed PC installations and may only be useful where laptops or notebooks are used).
Another consideration is where to use ferrite beads to prevent Radio frequency and Electromagnetic intererence. Ferrite beads should be used at about 50mm from either end of a cable run. So in the case of the installation cable a ferrite bead should be fitted to the projector cable at the projector end. (The computer should be connected to the cable kit using a short cable with a ferrite bead at the computer end of the cable)
The next question is whether the Horizontal sync and Vertical sync wires should also be coaxial pairs, the same as the Red Green and Blue (RGB) coaxial pairs ie whether to use 3 coaxial pairs or 5 coaxial pairs. We would recommend using coax for the sync signals to reduce interference.
And lastly the screening of the overall cable should be sufficient to prevent interference, this is often measured in "percentage cover" of the braiding or drain wire and foil. Braiding alone would normally have less than 100% cover as there are gaps in the braid, a design with a drain wire and foil "covers" the gaps 100%.
These design issues affect the video performance of the system, seen as "ghosting" to a greater or lesser extent in the projected image, not forgetting that picture quality is also affected by the length of the cable, connection mismatches, device output levels and the set-up of equipment.
There are choices for VGA cables with 3 or 5 coaxial pairs, with and without DDC wires and with and without ferrite beads to suit conditions and budget.
A 5 coax VGA cable without DDC or ferrite beads at the projector is the norm for the vast majority of education users.
Useful links
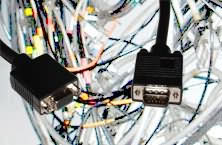
Tips for installing audio and video cables - especially high definition cables. Incorrect handling, pulling and installation techniques can deform audio visual cables which can then cause reflection problems which show as ghosting or a loss of signal strength which produces "snow" like effects on the projected image. I would recommend these best practices for cable installation, some of which may be stating the obvious, but useful as a checklist. (based on BS 6701 and EN50174 installation standards which are a good basis but a little indigestible).
Cabling Basics
-
Don't stand on or crush cables during installation.
-
Don't place equipment or furniture on the cables.
-
Don't allow the cables to be kinked during the installation process.
-
Cable pulling should be done slowly, steadily and carefully with no snatching and only minimal force.
-
Be careful not to exceed the minimum bend radius of the cable: 10 times the diameter of the cable for most AV cables. This is particularly important at right angle bends in trunking which often has sharp edges.
-
Don't tighten cable ties too tightly. If you cannot move any cable inside a tied bundle, the cable tie is too tight.
-
Don't put cable ties at identical distances apart. This can lead to deformation at a certain wavelengths, which can cause "Structural Return Loss". Ideally place cable ties at random distances.
-
Cables should be supported by trunking, conduit, cable trays, or tied at less than 600 mm horizontal or 1 metre vertical spacing to take the gravitational forces off of the cable. Cable sag should be less than 200mm.
-
Best practice to ensure that all cables are concealed in trunking, conduit or inside partition walls and labelled at the ends.
-
Cable in conduit runs in excess of 30 metres with more than two 90° equivalent turns should include a pull box. Each 90° turn is equivalent to the friction of a 10metre straight conduit run.
-
If cable is pulled into long conduit lengths, an anti-friction oil free lubricant should be used that is compatible with the cable sheath (some special thin-film wipes are available for this).
-
Be sure to maintain the original physical shape of the cable.
-
AV cable routes should be separated by more than 300 mm from fluorescent lights and other sources of electrical interference wherever possible.
-
AV cables and power cables should ideally only cross at right angles to each other.
-
AV cables should be no closer than 75mm from any unprotected (power cables without screening or not inside steel conduit) 230volt 20 amp 50/60Hz power cables to avoid interference (though BS 6701:2004 and EN50174 conflict to some extent about segregation of AV cables from power – 50mm to 75mm is recommended depending on safety or electromagnetic interference).
-
Ideally AV cables should not share the same trunking as power cords or cables due to interference but if they do then spacers should be used and the cables segregated (a plastic separator between power and AV cables) to provide electrical safety.
If you use a third party installer - check that they comply with these rules which should provide you with a well installed system with a long working life.
It's not difficult to replace a projector lamp - these tips will help though it is important to follow the manufacturer's instructions in the user manual, which may also include cleaning the filters and disposal etc.
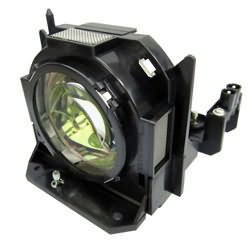 Safety First
Projector lamps are extremely hot when running and take a long time to cool down, most also contain mercury vapour which is a dangerous and very toxic chemical, follow these simple rules to avoid injury to yourself and others
Useful Fitting Tips and the Basic Steps
Do not touch the glass bulb or the reflector surface of the new lamp. Natural oils and sweat from your hands, at the extreme, can cause the glass bulb to shatter (or explode) when it gets hot and can also reduce the brightness of the image as impurities burn into the glass surface of the bulb or the metallic surface of the reflector.
Use a dry, lint free cloth to clean the lamp bulb or reflector surface if they are touched by accident.
-
Turn the projector OFF by depressing the power button on the projector or remote control, if the projector is in use, (do not remove the power cord until the projector has turned itself off after a cooling period)
-
Allow the projector to cool down for a further 30 - 45 minutes until the lamp inside is cool.
-
Disconnect the projector from the mains power cable
-
Remove the screws on the lamp compartment and remove the cover
-
Remove the fixing screws from the lamp module
-
Remove the lamp slowly and with care.
- Clean filters and other items as described in the user manual
-
Insert the new lamp carefully without touching the bulb or reflector surface,
-
Tighten the screws on the lamp (do not over tighten),
-
Replace the lamp compartment cover and tighten the screws on the cover.
-
Reconnect the power cable and turn the projector on to check that it is working and to reset the lamp hour counter (as appropriate).
Counter Reset
On many models the lamp hour counter MUST be reset through the projector menu. Resetting the hour counter also resets the "ballast" for the new lamp.
Old Lamp Disposal
Check the requirements for disposal of the old projector lamp in your country. The projector bulb contains a small amount of mercury vapour, and in many countries the disposal of mercury vapour lamps requires a licensed operator to take the lamp for processing and final recovery of it's materials depending on the quantity of mercury involved
Do it Yourself or use an Installer
Whilst a replacement lamp is not so difficult to change, especially if you have previous experience, it is largely the installer's previous experience that makes sure the job is done well, they will have the step ladders and tools needed, and make sure that the the projector is re-aligned, cleaned properly and the counter reset so that it is ready to use next time you need it.
Whiteboards can get really messy but are not too difficult to bring back to life if you follow a few simple tricks.
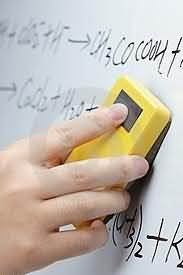 Don't use the wrong types of cleaning products as these may damage the surface. Abrasive cleaners remove the surface coating making it much harder to clean next time when the ink has soaked into the sub-surface.
What you need for a “full” whiteboard clean
- Dry eraser
- Dry erase markers
- Rubbing alcohol from a chemist
- Water
- Spray bottle
- Tissues or lint-free cloth
The process
- First clean as much as you can using a normal clean dry whiteboard eraser – this removes dry dust.
-
For any small marks that remain, before you try other cleaners, draw over the offending mark with a new dry erase marker, then wipe it off. Often this will remove stains or marks without resorting to the measures below.
-
For more stubborn areas or to clean the whole board surface make-up a spray solution. Mix 1 part “rubbing alcohol” with 3 parts of water in a clean spray bottle (if you don't have access to a propriety whiteboard cleaner made especially for whiteboard cleaning) .
-
Shake the spray bottle before use to thoroughly mix the ingredients.
-
Spray the board with the cleaner then wipe clean using dry tissues or a cloth.
-
Apply a little undiluted rubbing alcohol on a clean cloth and leave for about 2 minutes for permanent marker or very stubborn stains.
-
The process may smear the ink as you clean so you may need to repeat the process a few times with clean dry tissues or cloth.
-
Leave the whiteboard to dry for 30 minutes or longer after cleaning
This water alcohol spray can be used to brighten a whiteboard that has become dull.
This cleaning process, and almost any other, doesn't work so well on stains that have remained on the board for many weeks, so the trick is to clean regularly. (there are graffiti type cleaners for boards that don't come clean with this process – see the links below for details)
Always allow the cleaned board to dry out thoroughly before re-use. The whiteboard may feel dry to touch but it needs at least half an hour or more to dry thoroughly before you write on it again. Ideally clean at the end of the day, or at the end of the week, to give the whiteboard a good chance to dry completely.
The name "rubbing alcohol" is a term for either isopropyl alcohol (isopropanol) or ethyl alcohol (ethanol) products that are readily available from most chemists shops, the term rubbing come from the use as a medical skin cleanser.
Whiteboards, including Interactive Whiteboards are made with melamine, coated steel or vitreous enamel surfaces - melamine is the lowest cost but the easiest to damage with incorrect cleaning materials
Warnings
Ensure that you are working in a room with adequate ventilation to remove fumes when using an alcohol cleaner
Always test whiteboard cleaners in an inconspicuous area of the board to ensure your board tolerates the cleaner.
Check the product label warnings. Labels for rubbing alcohol usually include a number of warnings about flammability hazards and its intended use only as a topical antiseptic and not for internal wounds or consumption. Use in a well-ventilated area due to inhalation hazards. Poisoning can occur from ingestion, inhalation, or consumption. Avoid contact with eyes. Keep safe from children.
Read more:
Whiteboard cleaning - test results for many cleaning materials
How to clean a whiteboard - David Alexander Smith
How to make a whiteboard clean - eHow
How to clean whiteboards - eHow Family
About the Author
David Edis-Bates, C.Eng MIET spent more than 30 years in export related communication, IT and electronics activities around the world. He lived in Taiwan for 4 years in the late 70’s and in China since 2004. He taught part time in further education for several years in the UK and is currently CEO of EdisAV doing more of what he enjoys doing most.